Tuesday, July 31, 2012

Getting My Nerd On (Part 2.3)

(Western Digital Caviar Black, photo by Thomas Joseph C. Huang)
Last week, I managed to produce for myself some extra cash by selling a few items online.  This led me to take a look at my Rig Building Checklist and what do you know, there is a component that falls right into the price range of the cash I have on hand. And this component was my Hard Drive. The Hard Drive I have selected is the Western Digital 1TB Black Caviar. This is a 3.5" Dual Processor Internal Hard Drive that spins at 7,200 RPM with 64MB of cache memory. This model is 1 of the 3 Caviar series of Western Digital (The 3 models are Caviar Black, Caviar Blue and Caviar Green). So now, you may be asking yourself, "What's the difference between them all?", don't worry, I've asked myself that question as well. Now I did some digging and I found some basic items that may answer your questions. The Caviar Black series is the top of the bunch (for the Caviar Series) in terms of power and performance. The Caviar Black has been optimized for performance but with this optimized performance comes higher power consumption and noise, however this noise may be negligible when it comes to overall Rig noise as it isn't the only component generating noise. The Caviar Blue is the marketed to be the perfect balance between power consumption and performance, spinning also at 7,200 RPM but has less cache memory than the Caviar Black and lastly, the Caviar Green is designed to be the most power efficient and quiet of the three at the expense of performance. The Caviar Green does not have a fixed speed as opposed to the Caviar Black and Blue, it runs on what Western Digital calls "IntelliPower" and based on my understanding, this means that the speed varies depending on drive usage and when not in use, the drive does not spin up thus saving power, did some research too and the speeds of the Caviar Green are in the range of 5,400-5,900 RPM. All three drives are SATA3 though.


I chose the Caviar Black series simply because I didn't want to take any chances when it came to the overall performance of my system. Once I put everything together, we shall see how it performs.


Thank you to my girlfriend for her endless support and patience, I love you! And thank you PCHub for my Hard Drive and for the great service!


Stay tuned for the next part of this series! I have 2 components left before the completion of my main system! (Not including the Monitor, Mouse, Keyboard and Speaker System)


For Part 1, check it here: http://tomhuang03.blogspot.com/2012/06/getting-my-nerd-on-part-1.html
For Part 2, check it here: http://tomhuang03.blogspot.com/2012/06/getting-my-nerd-on-part-2.html
For Part 2.1, check it here: http://tomhuang03.blogspot.com/2012/07/getting-my-nerd-on-part-21.html
For Part 2.2, check it here: http://tomhuang03.blogspot.com/2012/07/getting-my-nerd-on-part-22.html

Tuesday, July 24, 2012

The Revival Project: The Overhaul

In a previous post ( http://tomhuang03.blogspot.com/2012/06/amd-duron-850mhz-spitfire-my-first.html ), I discussed my very first overclocking attempt using my old rig. I mentioned that I will be gathering benchmarking tools and run some tests on the said system, I now have those tools, however, I encountered a problem with my old system. I tried powering it up and the Hard Disk Drive was no longer recognized by the motherboard or in the BIOS. My first thought was to blame the Hard Disk Drive (Seagate 40GB IDE) so I decided to isolate, I bought a Hard Disk enclosure (IDE to USB interface) and tested it on my laptop, the Hard Disk reads without any hiccups, therefore I concluded that it isn't the Hard Drive, I switched IDE Cables as well and the motherboard still won't recognize it, therefore, I have come to the conclusion that the failure comes from the motherboard itself, the IDE port is no longer functioning. To resolve the issue, I went in search of a Socket A 462 Motherboard. This was no easy task as this type of hardware is about 10 years old already. But fortunately enough, using a Philippines based website called TipidPC.com, I posted what I needed at the Want To Buy section and luckily, I was able to receive a text message offering a secondhand motherboard, an MSI KM2M Combo motherboard for 900 bucks (PhP).


Now the "surgery" begins.

(AMD Duron 850 and heatsink, Photo by Thomas Joseph C. Huang)
(CPU with new Thermal Paste, Photo by Thomas Joseph C. Huang)
(Proper Alignment, photo taken from AMD Support Website)
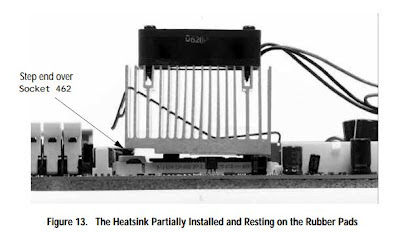
First off, I made sure that nothing was connected to any power wall outlets. After, I made sure to touch my set of dumbbells to discharge any static electricity (I wear a silver bracelet, but better safe than sorry.) then I proceeded to removing the side panel of the case. After removing all the cables connected the motherboard, I unmounted the PSU because it was in the way of getting to the CPU area of the motherboard. After setting the PSU aside, I freed the CPU cooler (standard heatsink with fan) and set that aside, after which, unclamped the CPU and removed the processor and set that aside too. Looking at the processor and the heatsink fan, it was covered in dust and the used thermal paste. I cleaned off the dust using rubbing alcohol and cotton buds, I repeated this process until the bottom of the Heat sink and the top of the CPU were free from thermal paste. I also cleaned off all the dust on the heatsink and the fan. Once cleaned, I mounted the processor onto the socket of the new motherboard. Then I put some new thermal paste, about the size of a grain of rice onto the center of the CPU chip (the small square in the middle of the bigger square). I used Deep Cool Z3 thermal paste, it's priced quite cheaply and works well in terms of thermal conductivity that aids in heat dissipation and comes in the easy to use syringe. Once the new thermal paste was applied, I then reattached the heatsink and fan. Just a little tip when reattaching the heatsink, you need to make sure that the the alignment is correct, meaning that the stepped area on the base of the heatsink is properly aligned with the socket. (refer to the photo labeled Proper Alignement, taken from http://support.amd.com/us/Processor_TechDocs/23986.pdf), you may also need to use a flat head screwdriver to ease the the heatsink clip into place, by using this method, you don't apply any direct force onto the CPU which may cause damage.
(CPU in place, Photo by Thomas Joseph C. Huang) 


Now that CPU is in place, I inserted the PC133 RAM into the RAM slot, then I connected all the necessary wires to their corresponding locations on the motherboard. I also connected the hard disk drive to the corresponding IDE port on the motherboard as well.


(All wired in, Photo by Thomas Joseph C. Huang)
Now that everything is in place, I plugged in the power supply to the wall socket and turned on the monitor. Then, the moment of truth! I pushed the power button.


Nothing. Happened. No beeps. No monitor display output. I double checked all the wiring connections, checked the internet for some troubleshooting tips and asked a few friends for advice as well.


Apparently, due to my excitement, I hadn't noticed that the current power supply (it's a generic one, a mere 235w PSU) I was using didn't have the 4-pin 12v power connector, it seems that the previous motherboard I was using didn't require this connector to power up the CPU, hence it's absence. This board is of "newer technology" so to speak. So I thought of a quick solution, find another generic power supply unit that is equipped with a 4-pin 12v power connector. And luckily, I found one from one of the stores (PCNetmiles to be exact) I mentioned in part 2 of the Getting My Nerd On series, as usual, a quick and hassle free transaction yielded me to purchasing a generic 600w PSU for 590 bucks (PhP). I also stopped by another store for 2pcs of 256MB PC133 RAM (secondhand) to replace the current 128MB PC133 RAM, I got these at a price of PhP280 for both. Not a bad way to spend 870 bucks (PhP).

Unfortunately, I got a lemon when it came to the PSU I first bought, it wouldn't power up at all. Tried unwiring and rewiring and on a different motherboard and still no power. But PCNetmiles is a very reasonable shop and replaced the PSU right away, no questions asked. However, there seems to be a deeper issue. After being all wired in, I proceeded with turning on the PC. CPU fan spun normally, hard drive was running as well, but all I got was a gray-like display on the screen, but nothing else. No beeps either, despite having the system speaker front panel connector in place. I searched the net and found this nice checklist from Tom's Hardware (see link below), I will run through it and see if the problem gets resolved throughout any point of the list.

Link: http://www.tomshardware.com/forum/261145-31-perform-steps-posting-post-boot-video-problems

Hope that somewhere through this checklist, the problem will be resolved.

Sunday, July 15, 2012

Getting My Nerd On (Part 2.2)

Today (July 13) is payday, fortunately for me, this payday also included our annual performance bonus. In short, more money. This granted me the wonderful opportunity to purchase another part for my rig without going hungry until the next paycheck. Haha. So again, I referred to my build checklist and decided to get my Video Card/Graphics Processing Unit. Now Graphics Processing Unit or GPU could turn out to be one of the priciest aspects of your rig (depending on the goals of the said rig of course) but if you're like me, who wants to get some decent gaming done on his/her rig, then it would be wise to pick a card that suits your needs and budget. The card I have chosen doesn't essentially fall under the high end category in terms of performance, but it should get the job done, in terms of quality of game playing. And price wise, it falls under a generally moderate range (in PhP). Because it's higher priced relatives offer almost the same performance output but for an exuberant price. This observation is a fruit of my research when finding alternatives or back ups in the event of item unavailability. To all the nVidia users out there, I am not waging any wars, it's just personal preference! :]


The card I have selected was initially the PowerColor HD 6870, but due to the seemingly unending availability issues I've been encountering during this build, I went for the Sapphire HD 6870 instead, which is about 20 bucks (PhP) more expensive than its PowerColor variant. I was able to stick with my card of choice though, which is a good thing despite switching brands. And as always, I did my research before making the switch, I've read a lot of good things about Sapphire, but of course, I don't take it all on reading, watch some test videos and finally, I'll see for myself once the build is complete.

A short overview of it's specifications:

GPU900 MHz Core Clock
Memory

Power Requirement
1GB
256 -bit GDDR5

500W PSU required


(Sapphire Radeon HD 6870, Photo taken by Thomas Joseph C. Huang)


I paid a visit to Gilmore IT Center once again (mentioned in Part 2: http://tomhuang03.blogspot.com/2012/06/getting-my-nerd-on-part-2.html), took my ever supportive girlfriend with me and headed straight for a shop called PCHub (I headed straight for this shop because I did my canvassing and availability checks prior to the visit (very useful tip when building your own rig, saves you a lot of trouble.) Dealing with the people in this shop is a very pleasant experience, they are very accommodating and the way they relate to customers is very professional and friendly. One thing I liked too is that after you make your purchase, you are offered to test what you just bought, an option that I took to assure that the video card I bought is working, which thankfully it is.

Having purchased this part, this puts me at about 60% completion based on my checklist. The only items left are the following: RAM Sticks, Internal Hard Drive and a chassis.

Just wanted to update everybody on the progress of my build!

(Me and the GPU!, Photo courtesy of Janine Lyn David)
Thank you PCHub for the awesome service and for the video card!


Stay tuned for the next part of the Getting My Nerd On series as I continue my quest for the completion of my rig!


For Part 1, check it here: http://tomhuang03.blogspot.com/2012/06/getting-my-nerd-on-part-1.html
For Part 2, check it here: http://tomhuang03.blogspot.com/2012/06/getting-my-nerd-on-part-2.html
For Part 2.1, check it here: http://tomhuang03.blogspot.com/2012/07/getting-my-nerd-on-part-21.html

Saturday, July 14, 2012

Getting My Nerd On (Part 2.1)

A couple of days ago, I was able to sell my old mobile phone (HTC Wildfire) for a fairly good price given it's condition and age. With the funds earned from this, I took out my PC Rig Checklist and took a look at which part I could purchase with the funds that I have. I decided to go with the Power Supply Unit (PSU). I sent out the necessary inquiries to the stores of my choice and was able to get one reserved from the shop I bought my Motherboard from mentioned in Part 2 (http://tomhuang03.blogspot.com/2012/06/getting-my-nerd-on-part-2.html). Now the Power Supply Unit is an important part when building a rig because as the name suggests, this is where you would get the supply of power for all the components of your rig. Simply put, PSU = Power for your machine! But to delve a little deeper, the main function of the Power Supply Unit is to convert the high voltage from the wall outlet into lower voltages that are required by each component of your system. If this voltage conversion is done improperly, it can cause damage to your components and/or system instability. Hence the importance of choosing a PSU that meets the needs of your setup. One of the things to consider are the components that draw the most power, in most cases, it would be the CPU and the GPU. But the PSU generally brings to life the whole system once everything has been put together.

I have selected, I chose the AeroCool Strike X 1100w 80 Plus Gold Modular Power Supply Unit. I will not go into extreme detail about this item but for more information you may refer to the website: http://www.aerocool.com.tw/index.php/products/strike-x/47-strike-x-power/137-strike-x-power-1100w

But rest assured, this PSU has enough juice to power the current setup I have mapped out as well as leave pretty decent headroom for future upgrades and for a price that isn't too shabby either. The main highlights of this product in my opinion are as follows:

(Photo by Thomas Joseph Huang)
1. High Efficiency Rating: (80 Plus Gold)
2. High Reliability: 120,000 hours MTBF (Mean Time Between Failures)
3. High capacity power output: 1,100watts
4. Over Current, Over Voltage, Over Wattage, Over Temperature and Short Circuit Protections in place.


Now I know that this is a whole lot of power and you might be thinking, what am I to do with all of this? As mentioned, I like to leave decent headroom for future upgrades as well as future-proofing my rig. I'd like to be overpowered than underpowered, better to be over prepared than caught off guard.


We'll see how well it performs once the rig is completed.


Thank you PCNetmiles (Eton Cyberpod) for the quick and hassle free transaction!

Stay tuned for the continuation of Phase 2 of the Hardware shopping step (Step 2.2)!


For Part 1, check it here: http://tomhuang03.blogspot.com/2012/06/getting-my-nerd-on-part-1.html
For Part 2, check it here: http://tomhuang03.blogspot.com/2012/06/getting-my-nerd-on-part-2.html


Tuesday, July 10, 2012

Batman: Arkham City (Game Of The Year Edition) PS3 Video Game Review

Batman: Arkham City Game Of The Year Edition


07/02/2012
Today, my girlfriend and I celebrate our 1st Year Anniversary and being the sweet and loving girlfriend that she is, she decided to let me choose a PS3 game that she would buy for me. I chose this game, because I had been looking to get this for quite sometime now but never got around to doing so, lucky for me, my timing was right as the GOTY Edition has already been released, this means for little extra amount of money, I get bonus content for free! This includes the following: Harley Quinn's Revenge DLC, Catwoman Pack, Robin Bundle Pack, Nightwing Bundle Pack, Arkham City Skins Pack and a Challenge Map Pack. All this included in a game 200 bucks (PhP) more than the original/standard one.


Now the folks at Warner Bros. Games and Rocksteady have went all out on this game which is the direct sequel to the amazing first chapter of the Batman franchise which is Batman Arkham Asylum. Now for those who played the first installment, you would know that it had a pretty dark setting going about it and for Arkham City, things got a little bit darker. And that's something would be expected, just picture this: Gotham's baddest of the bad, all in one place, a prison the size of a city, within Gotham City.


We don't start off straightforwardly as our famed caped crusader, but instead, you start off as Bruce Wayne, trying to make a little protest against the presence of Arkham City, this doesn't sit well with it's "Warden", Professor Hugo Strange disrupts his speech using his personal army. You eventually wake up dazed within the walls of Arkham City. But of course, being the hero, you get to a point wherein you eventually get geared up for action. Apart from this, you also have the opportunity to play a bit of a side story as Catwoman in various parts of the game. Similar to Arkham Asylum, the area of play is quite vast and almost fully explore-able. The map is vast and the  to make you feel like you are actually going around an entire city. You also get to experience some weather effects which add to the graphical architecture of the game and this also adds to the feeling like you are moving within a big and dangerous city.

The fun from the previous game hasn't changed and I'm referring to the straightforward jump in the middle of battle and beat everyone who comes within reach. Or go for the stealthy approach and pick the bad guys apart little by little striking fear with every stealth takedown. Free flow combat has also been retained and improved as well with some nifty new moves and takedowns. And the enemies aren't as dumb as you'd make them out to be because the foes here now have access to firearms and various weapons that they can just run and pickup despite temporarily disarming them. This means taking on the bad guys involves a little bit of strategic thinking.


The gear and the moves definitely will not disappoint players, as it seems that Arkham City has taken best or good bits and pieces from the entire Batman franchise and put them all into one solid game or in this case, one solid character. The storyline is something that was well thought out, simple yet complicated and apart from the main storyline, of course you have the various side missions, ranging from saving political prisoners, to saving Riddler's kidnap victims by solving his riddles, to tracking down Victor Zsasz by dashing throughout the city and catching ringing payphones to save victims. These side missions give the game a high replay value, plus the DLCs included will definitely prolong your adventure in this game.


Getting around Arkham City is pretty fun, you pretty much glide and grapple hook your way around town. Although I wish they would have thrown in the Batmobile just for the heck of it, it is after all the iconic vehicle of Batman. But overall, in my opinion, this game could be considered an ultimate game. Simply put, it is like a movie wherein the player is interactively involved, the audiovisual aspect of the game is thoroughly pleasing and the storyline offers depth and intensity.

Ranking:
Story: 9/10
Gameplay: 9/10
Graphics: 9/10
Soundtrack: 8/10

Overall: I think this game deserves a 10/10. The story is intense and deep and the gameplay is very fluid and action packed. The replayability of the game is also very high due to the fact that there are various sidemissions as well as DLCs make the game very long and interesting.

Sunday, July 1, 2012

Sunday Geek Out

Today, I awoke from a dream that brought me back to my childhood, it was a dream of me sitting in front of an old television set, watching reruns of the Batman and Spider-Man cartoons. As well as browsing through the comic cutouts from the Sunday newspaper that might grandfather used to keep for me. This sparked a thought in me, why not get grab some comic books of the superheros I grew up to? Today, I grabbed a few copies from a nearby comic book store near my house called Comic Odyssey. Lucky for me, their back issues were on sale! 50 bucks (PhP) for any one of the back issue items they had! I went over to the store with 1 thought in mind, look for the 1st Issue items (probably not the correct approach taken by the hardcore comic fanatics, I could be wrong though, please suggest as I am open to proper guidance! :])


(Comic Books, Photo taken by Thomas Joseph C. Huang)


Here's what I got:


1. Ultimate Spider-Man: Warriors: Part 1
2. Ultimate Spider-Man: Issue # 1 (Published August 2009)
3. Web Of Spider-Man Issue # 1
4. Ultimate Spider-Man: Hollywood: Part 1
5. Batman: The Legend Of The Dark Knight: Bad: Part 1


This looks to be the beginning of the revival of a childhood hobby. I'm probably not as hardcore as the comic collecting hobbyist/enthusiasts out there, but I thoroughly enjoy comic books and my childhood superheroes. I guess you can say that my childhood never really left me (most of us will and can admit that theirs have never left either.) and that up to this day, I still am the geeky kid I was about 15 years ago and I'm proud of it! :]

(Spider-Man, photo courtesy of Google)
(Batman, photo courtesy of Google)